Showing posts with label creativity. Show all posts

Wednesday, 19 August 2015

Nurture Hope: an infertility story

After I had surgery almost a year ago, I was very hopeful that my husband and my dream of having a family would quickly become a reality. I followed up with our fertility clinic a few weeks into my recovery, and I was given a prescription for fertility medications to help us along that path. Unfortunately, when I went back in for routine monitoring a month later, my doctor found that the endometrioma (a cyst caused by endometriosis) on my left ovary that had been removed along with part of my bowel, had returned and completely taken it over. That means that, despite having just had surgery, my endometriosis was back and doing significant damage to my reproductive organs. At this point, my doctor recommended that we take advantage of the very small and honestly, a little unlikely window of opportunity we have after surgery, and attempt an IVF cycle. 
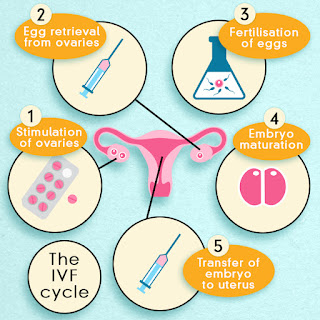
This was a scary thing for me to hear. I have never been keen on the IVF process, and the low chances, made even lower by my medical status, make the investment of emotions, physical pain/discomfort, and finances all the more of a risk. But we really want a family, and if this was the only way, then so be it. 

When I got the call that our name had come up on the waiting list to start a cycle, it was a few months sooner than I had thought it would be. So of course we jumped on it, and started the long and intensive process of oral hormone medications, injectables, almost daily blood and ultrasound monitoring, scary medical procedures, progesterone suppositories, and emotional turmoil. 
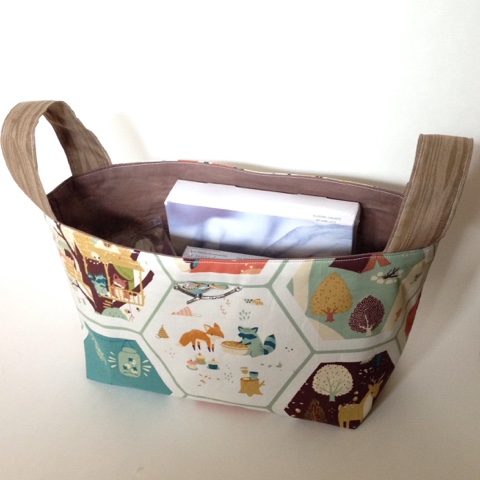
I made a beautiful hour basket to hold all my injection supplies- the process wouldn't be pretty, but gosh darn it, the needles can be kept somewhere pretty!
To help me cope with the emotional side of this process, I decided to make a special quilt to give me comfort at the end of this, regardless of the outcome. I wanted something cozy, with my hopes and dreams and pain sewn right into it, and significance in every stitch. 


So of course, I called my fave Charley Harper into action. His most recently released line was called Nurture, and it features mama animals with their babies. It was meant to be! And the name of the line fit perfectly with my meditation, and eventual theme for the quilt - Nurture Hope. Because above all, hope and faith are the most important things in this long and hard journey. And Hope doesn't necessarily come easily. You have to keep it tucked away in your heart, and feed it happy thoughts (which are sometimes hard to come by when dealing with infertility), and stroke it when it is feeling small and scared. And you have to do this even when The Facts are screaming at you that your hope is unreasonable and unlikely. You have to Nurture Hope. And this quilt helped me do that. 


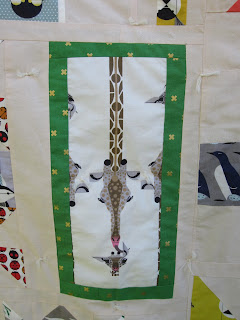
I decided to make a sampler style quilt, so that each print with their different scales could be properly featured in an individual block of their own. First I spelled out the words Nurture Hope. Sometimes you need a constant reminder of your task before you, to help you stay on track. Having these words up on my design wall for a few months was very helpful indeed. Next, I made the large blocks, using a different print for the centre of each block. I didn't have a plan at all in terms of where the quilt was heading, so lastly, I made small blocks, and the ones with funny shapes to fill in the spaces between blocks in the layout. This was a very fun part, changing and rearranging until the final product was just right. And sometimes, initial thoughts and intentions changed or modified into something better. 


I have many parts of this quilt that have special meaning to me, and here I will share them:
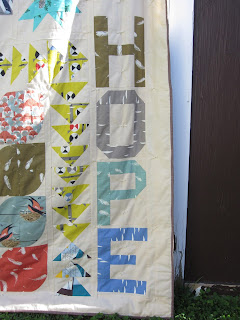
Above all, the message is so important to me.  Nurture Hope.
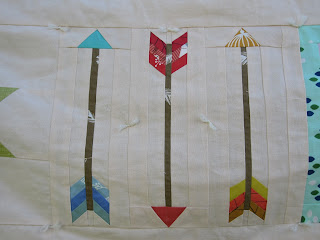
Infertility is filled with ups and downs.  I try to maintain more ups, but sometimes you fall into a pit of despair.  Especially when your period arrives despite all your hopes otherwise.  Hence the red arrow is the down arrow.  
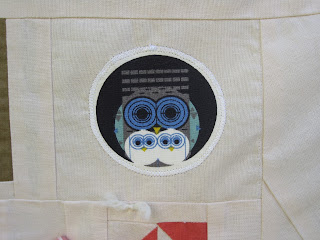
This little piece of artwork is called Family Owlbum.  That is just so special, and one of my favourites from the collection.
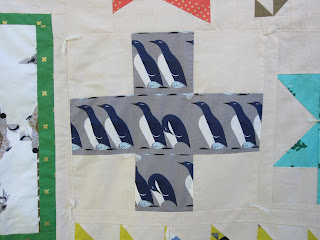
These penguins pretty much sum up living with infertility.  All around you, everyone has their egg, but you are alone in thinking "Where's my egg?"  Everyone has their eyes up and focused on other things, but the mamas without their eggs have their eyes focused squarely on where their eggs should be.  Rarely are your thoughts diverted otherwise.  My heart aches for the penguins without their eggs.  
Sometimes you have a million thoughts in your head during the IVF process.  What if I'm doing the injections wrong?  Is this feeling normal?  Does this pain mean it isn't working?  Will this work?  Of course it will work.  It's impossible that it will work.  What happens to me if it doesn't work?  It's not fair.  Fear, anxiety, glimmers of hope.  You must Be Still.  Have faith.  Nurture Hope.
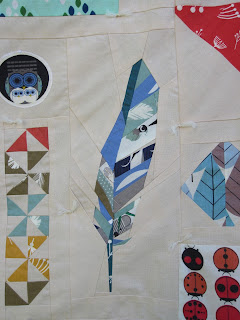
The feathers represent for me that, as with fabric scraps that you can piece together to make something whole, so it is with life.  Sometimes you don't have the whole image to be able to have the perfect picture of life.  But you can still make a good life with what you have.  
This artwork is called Love from Above.  I truly feel that love is greater than all of us, and God's role in my journey has been integral.  Faith and hope can be hard to come by, but that constant love from above can keep you going when things seem bleak.  
And ultimately, love conquers all.  

For me, this process has been such a metaphor for this journey. You start with the major plot points planned out in your head, and then you have to fill in the middle with unexpected and unplanned aspects, all the while rearranging, adapting, and persevering through, even when you don't know how it's going to turn out in the end, fearing that it will all be a terrible mess, and all the while remembering to Nurture Hope. 


And finally, after all the waiting and all the work, and all the anxiety, you have a happy ending. A beautiful quilt, and a beautiful pregnancy. I am so happy to report that our journey has a happy ending. Against many odds, our hoping and wishing and praying has been for a baby to call our own, and now we have that chance. Oh happy day! 


Thursday, 2 July 2015

Cotton + Steel Mini Quilt Swap: Pt 2: Outgoing

I had so much fun with the Cotton + Steel Mini Quilt Swap.  


It was the perfect excuse to sign up for the monthly Cotton + Steel Club over at Pink Castle Fabrics . This club is the best for building a stash of C+S without having to specifically choose what you want.  Which can be hard to do when you want everything!  After a few months, I had everything I needed and more to put together a mini quilt and extras for this swap.

My assigned partner said that she likes minimalist quilts made with paper piecing, loaded with amazing machine quilting.  Huh.  I can definitely rock the paper piecing, and I like minimalist quilts too, so that is no problem.  But I was very nervous about how I should quilt the thing.  My free motion skills are beginner at best.  I have dabbled in stipples and vines with leaves before, but nothing close to "amazing machine quilting."  But, inexperience has never stopped me before.  I am a first believer in just trying.  You never know how you might surprise yourself!

Completed quilt top
I chose a meandering geese pattern I spotted on Pinterest, some Essex linen, and a variety of C+S prints to make the top.  Then I spent the next couple weeks practicing graffiti doodling with pen and paper.  

My first attempt
This way I had some ideas of what kind of motifs worked well together, what filler designs I could use in between larger designs, and a general idea of placement within the quilt.  After making a quilt sandwich with a black backing to show off the quilting, I set to work.

First, I quilted triangle spirals inside the geese.  I decided to use the spool of Glow-in-the-Dark thread I have been hoarding.  Just in case the quilting was terrible, at least I had some special effects to fall back on!  Then I started the graffiti quilting.  My practice doodles definitely helped.  I ended up adding in other things as I went, and tried fancier designs as my confidence grew.  I wouldn't say the quilting is perfect, but I think I gave it a good try and am happy with the results!

Not too bad for my first time!
I designed a quilt label to look like a postcard, complete with a C+S stamp from one of the fabric prints, and bound it with a colourful print from the August line.  I prefer hand binding to machine binding, but up until this quilt, I have never been happy with my corners.  This quilt I really feel like I got those corners perfect!  It was a proud moment for me.

Look at those mitred corners in the binding!

All done and ready to send
After completing the quilt, I made a few extras to send along.  First, using another paper piecing pattern I found on Pinterest, I made a couple mix tape blocks, using C+S selvedge as the label to turn into a zippy pouch.  I think the little Hot Cross buns make the perfect wheels!  I stuffed the pouch with a notebook and pen, and some quilty washi tape.
Front and back of the pouch
I also made a needlebook (my fave quick project!) with mostly coral fabrics, and a pop of mustard inside.  And I finally got some wool felt from Modern Textiles when I was in Fargo last April, so I used some of the good stuff for the pages.  I also made a needleminder from the bunny fabric from the Mochi line.

I always love a needlebook
I rounded out the package with some lotion and lipgloss (always essential), some Canadian contraband treats (Coffee Crisp, Smarties, and the illegal-in-the-US Kinder Egg!), and a Berenstain Bears book called God Bless Our Home, as my partner just recently moved to a new house!

Rolled up for shipping
I had a great time putting together this package, and loved getting to know my partner through her photos.  It's always nice to make a new friend, and what better way than by sending a fun present?!

If you want to see what I received in this swap, see Cotton +Steel Mini Quilt Swap: Pt 1: Incoming

Tuesday, 21 April 2015

Charley Harper Swap pt 2: Outgoing

The #charleyharpersewnstudio swap wrapped up at the beginning of April. My partner finally got the package yesterday (it took 3 weeks to get from Winnipeg to Tennessee - ridiculous!) My partner said that her favourite prints are Foxsimilies, Family owlbum, and Mice Invasion. So I incorporated all of them into the package I sent.
A Charley Harper label to hint at what's inside!
First, the mini quilt. I waffled back and forth about what I wanted to do, until inspiration hit in the shower (where I do all my best thinking). I decided to recreate Family Owlbum as the main feature of the quilt. 
The original artwork

The owls were pretty challenging. I combined a few different techniques to achieve the final project. I used English Paper Piecing to make the large eyes and the baby owls. I used machine and hand applique to attach all the small parts, and embroidery to draw around the eyes. 
The owl family
I used needle turn applique to attach the portrait to the centre of a cream panel, and added four circles of the feathers fabric around the owls. Then I framed the whole thing using the twigs fabric as the corners. 
The front, before quilting
On the back, I attached a label made to look like a Charley Harper nest. 
This is my favourtie label ever
I wanted to make the circles really pop, so I left them unquilted, and did some free motion stiples around them on the cream fabric. And I did straight line quilting in the frame. I attempted machine binding for the first time for this project, because I wanted to try using a decorative stitch on the binding.  I prefer hand binding.  Maybe I'm just not very good at machine binding, but I wasn't thrilled with how it turned out.  
After quilting
Free motion stiples
Binding closeup
Love the pop!
In hindsight, I wish I would have centred the quilt label on the back to coincide with the owl on the front. It ended up half in and half out of the stiples, which I think is less than ideal. 
The back, post quilting
I made a few extras to include with the mini quilt. I made a needle book featuring Foxsimilies during my stay at 52 Quilters.
Those elephants were perfect for the inside!
I made a needleminder from the ladybug fabric.

And I made a pincushion/jar from the Mice Invasion fabric.
Jar and button courtesy of Grandma's hoarding!
I loved putting this package together for my partner. I enjoy Charley Harper's artwork so much, so it was a lot of fun to get to interact with it like this. Thanks Sewn Studio for hosting this super fun swap!

If you liked this post, you may be interested to see what I received in this swap!

Charley Harper Swap pt1: Incoming

And if you love reading about my love for Charley Harper, here's a few other gems for you.

Feelin' Good on a Wednesday: Charley Harper Love!

The Charley Harper Conundrum

The Charley Harper Resolution

Thursday, 2 April 2015

Just keep zipping: another pouch and a free pattern


After loving my last zippy bag, I realized I should probably make one for myself. I need a pouch to keep my knitting/crochet notions in to replace the ziploc bag currently in use. I've said it before, and I'm sure I'll say it again, but isn't it funny how us crafty people make nice things for others, but neglect ourselves?
Nice and big for all my knitting needs
I decided to treat myself. I wanted to feature a Tula Pink raccoon on one side, but I couldn't find a pattern that worked to keep the whole animal intact (who wants to cut off a raccoon's tail?!). So I made one! This was my first attempt to design a foundation paper pieced pattern, and after lots of false starts, and some drawing in the steam on the shower door, I figured out what I wanted to do. 
I love that little face!
Then I chose fabrics that coordinated, and set to work sewing. When I finished, I was so proud that it worked!
It's perfect!
With the front side done, it was time to think about the other side. I was thinking originally to do another postcard, but this bag is larger, so the stamps looked dwarfed on the page. I decided instead to use a print from the Brambleberry Ridge line, paired with a cream solid on which to do some embroidery. I embroidered my name, and appliquéd a little Lizzy House cat. 
It has my name on it.... I guess I get to keep it!
Then: I installed the zipper, but forget to top stitch over the zipper.  I sewed up the outside shell and liner before realizing I had missed a step.  I debated just running with it, but I really think that top stitch is the difference between a professional final product and an amateur final project.  So I had to rip stitches (and fabric-oops!), repair fabric holes, top stitch over zipper, re-sew up outside shell and liner, turn right side out, stitch closed hole, and then... Voila! Done!

This couldn't have come together better
And of course, when in doubt, put a bird on it!
An adorable zipper pull
I've very happy with this bag, and just keep petting it. The little details just make it so special to me. 
Hand embroidered name
Applique cat (my favourite!)

Look at that precision!
If you like the pattern for the raccoon side, good news! I am sharing it with you! Click here for a printable template with dimensions. If you use the pattern, please tag me in a picture on Instagram (@_LT_Smash), comment below, or direct me to your blog! Id love to see what you make with it!

Wednesday, 18 February 2015

First Rosette! (2015 project of the year)

I finished my first rosette for my La Passacaglia quilt! 

I used some of my Bluebird Park fabric from Kate and Birdie to put this cog together. It was definitely a challenge to figure out what direction I wanted to go with this. At first, I had a different centre to this cog. 
The original version
I just wasn't feeling it though. I tried auditioning other fabrics, but nothing was really working. 
Neither really works....
So I percolated with it for a while to figure out what was wrong with it. I looked through so many pictures of rosettes that other people had made, and thought a lot about what I liked about them. I realized that one thing I love about these quilts is the beauty in repetition. Another thing I love, is the distinct layers of each cog, like a bullseye. A bold star shape in the middle is a solid base to build upon. 

So when I looked at mine, I felt like it was strong in repetition, but weak in the distinct layers, especially the star. So I picked apart what I had so far and started over with the centre. I changed the middle to make a definite star, and changed the long diamond shapes to the green with a white flower instead of the dark grey linen. The dark grey just blended in too much with the bunnies/butterflies above. Also, the green tied in with the star points so much better. I like the final version much more than the original. 

In the making of this first rosette, I also realized the need for some fussy cutting templates. So I made some (and wrote a tutorial, in case you need some too!). And I also felt the need for a needleminder. I was inspired by @tinkerellen on Instagram to put together a simple magnetic needleminder made from a small wooden fox. 
He fits in well here!
And in case you were wondering what size these pieces are, here is a picture to give you an idea of the scale. 
Tiny!
I have really enjoyed working on this first rosette. The journey so far has been so enlightening, and I loved figuring out what works and what doesn't. I can't wait to keep making more!

To read more about this project, have a look at :

The Homemade Heart's La Passacaglia Quilt Index